
Finds your iPhone for you
A live card shows your iPhone the moment it connects, and tells you plainly when to unlock it or tap Trust. It keeps trying, so there’s nothing to click.
 PixelBeam for Windows
Copy photos and videos from your iPhone to your Windows PC by cable or Wi-Fi. See every photo before you save it, back up new ones automatically, and keep your originals on your phone.

Plug in your iPhone and PixelBeam takes it from there. It tells you plainly when to unlock or tap Trust.
A live card shows your iPhone the moment it connects, and tells you plainly when to unlock it or tap Trust. It keeps trying, so there’s nothing to click.
Your library appears as photos, grouped by month. Tick months or single shots, and open any photo full size before you save it.
Turn on automatic backup and new photos save themselves whenever your iPhone connects, with a few seconds to cancel and a notification when it’s done.
USB is fastest. Once your iPhone has connected by cable, PixelBeam can also use Wi-Fi, and it rides out brief drop-outs without losing your place.
PixelBeam remembers what’s already on your PC, so each backup copies only new photos, and an interrupted transfer picks up where it stopped.
Photos save straight to a folder on your PC, and your originals stay on your phone. Nothing is uploaded anywhere.
PixelBeam–□✕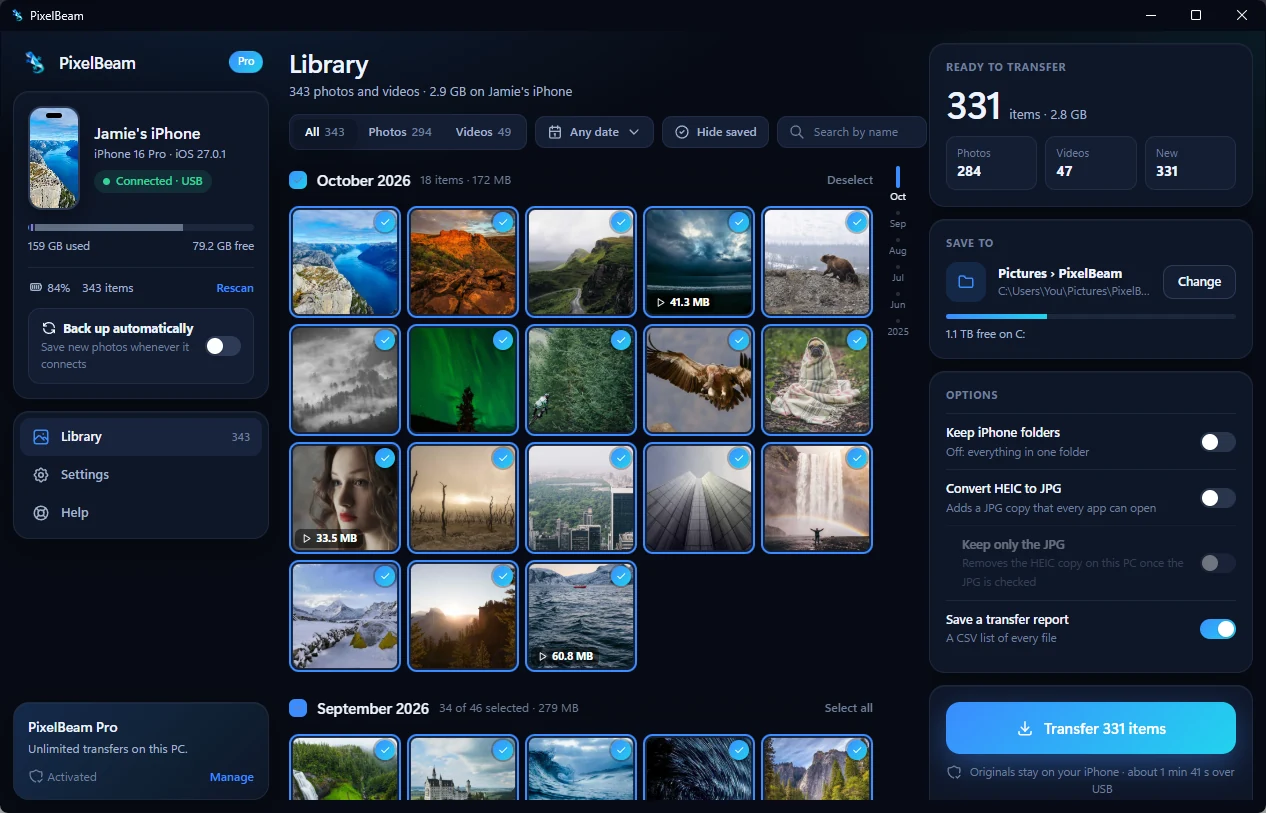
See every photo before you save it, then choose exactly what comes across.
PixelBeam–□✕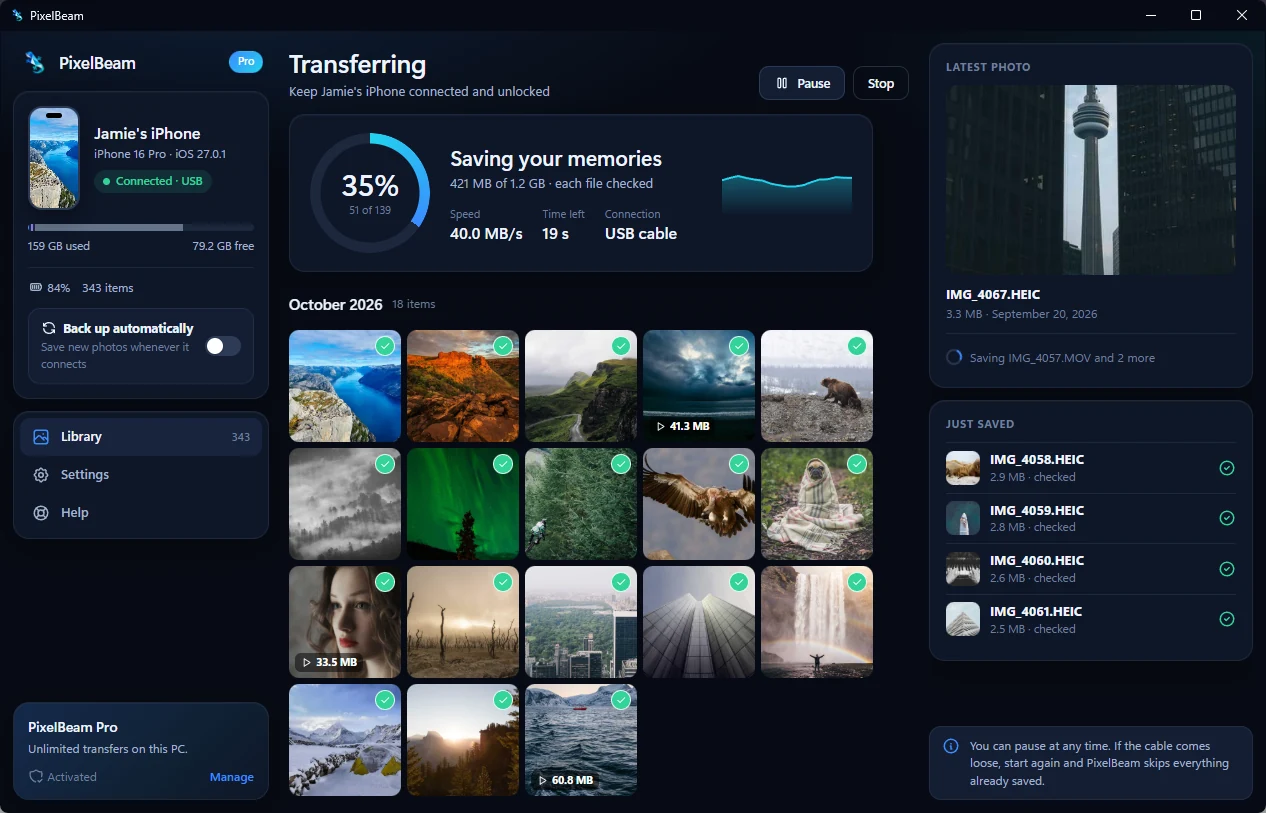
Watch each photo arrive, with speed and time left. Every file is checked once it’s saved.
Turn on automatic backup once. From then on, connecting your iPhone is all it takes, and you get a notification when it’s done.
See more photos on your iPhone than in PixelBeam? With Optimize iPhone Storage on, some originals live only in iCloud. Your phone can only hand over the files it actually has.
Locally stored originals are available for PixelBeam to copy over USB.
A smaller preview shows in Photos while the full original stays in the cloud.
Install PixelBeam and Apple Devices from the Microsoft Store before you connect your phone. The free demo checks your connection and copies up to 20 originals.
Use a data-capable USB cable. Unlock the phone, tap Trust when prompted, and enter your passcode.
PixelBeam finds your iPhone and shows your library by month. Pick everything new, whole months, or single photos.
Choose a folder and click Transfer. Turn on automatic backup to repeat it whenever your iPhone connects.
Scan your library for free and save up to 20 original files. A license unlocks unlimited transfers.
No. PixelBeam copies files to your PC and leaves the originals on your phone.
Some originals may only be in iCloud when Optimize iPhone Storage is on. PixelBeam can copy only files stored on your phone. See the iCloud steps above.
A Windows PC, a compatible iPhone or iPad, a data-capable USB cable for the first connection, and Apple Devices or iTunes. After that, PixelBeam can also connect over Wi-Fi. Internet is needed for license activation and periodic refresh.
$4.99 USD once, for two PCs. The app refreshes its signed activation now and then; an existing activation works offline for up to 30 days.
Empty DCIM folder, or no iPhone at all? Five checks, in order.
iPhone to PCWhy Windows stops halfway through an import, and the setting that fixes it.
iPhone to PCOpen them, convert them, or keep originals and JPG copies side by side.
PixelBeam for Windows
The demo scans your whole library and copies up to 20 originals, so you can check everything works before you pay.